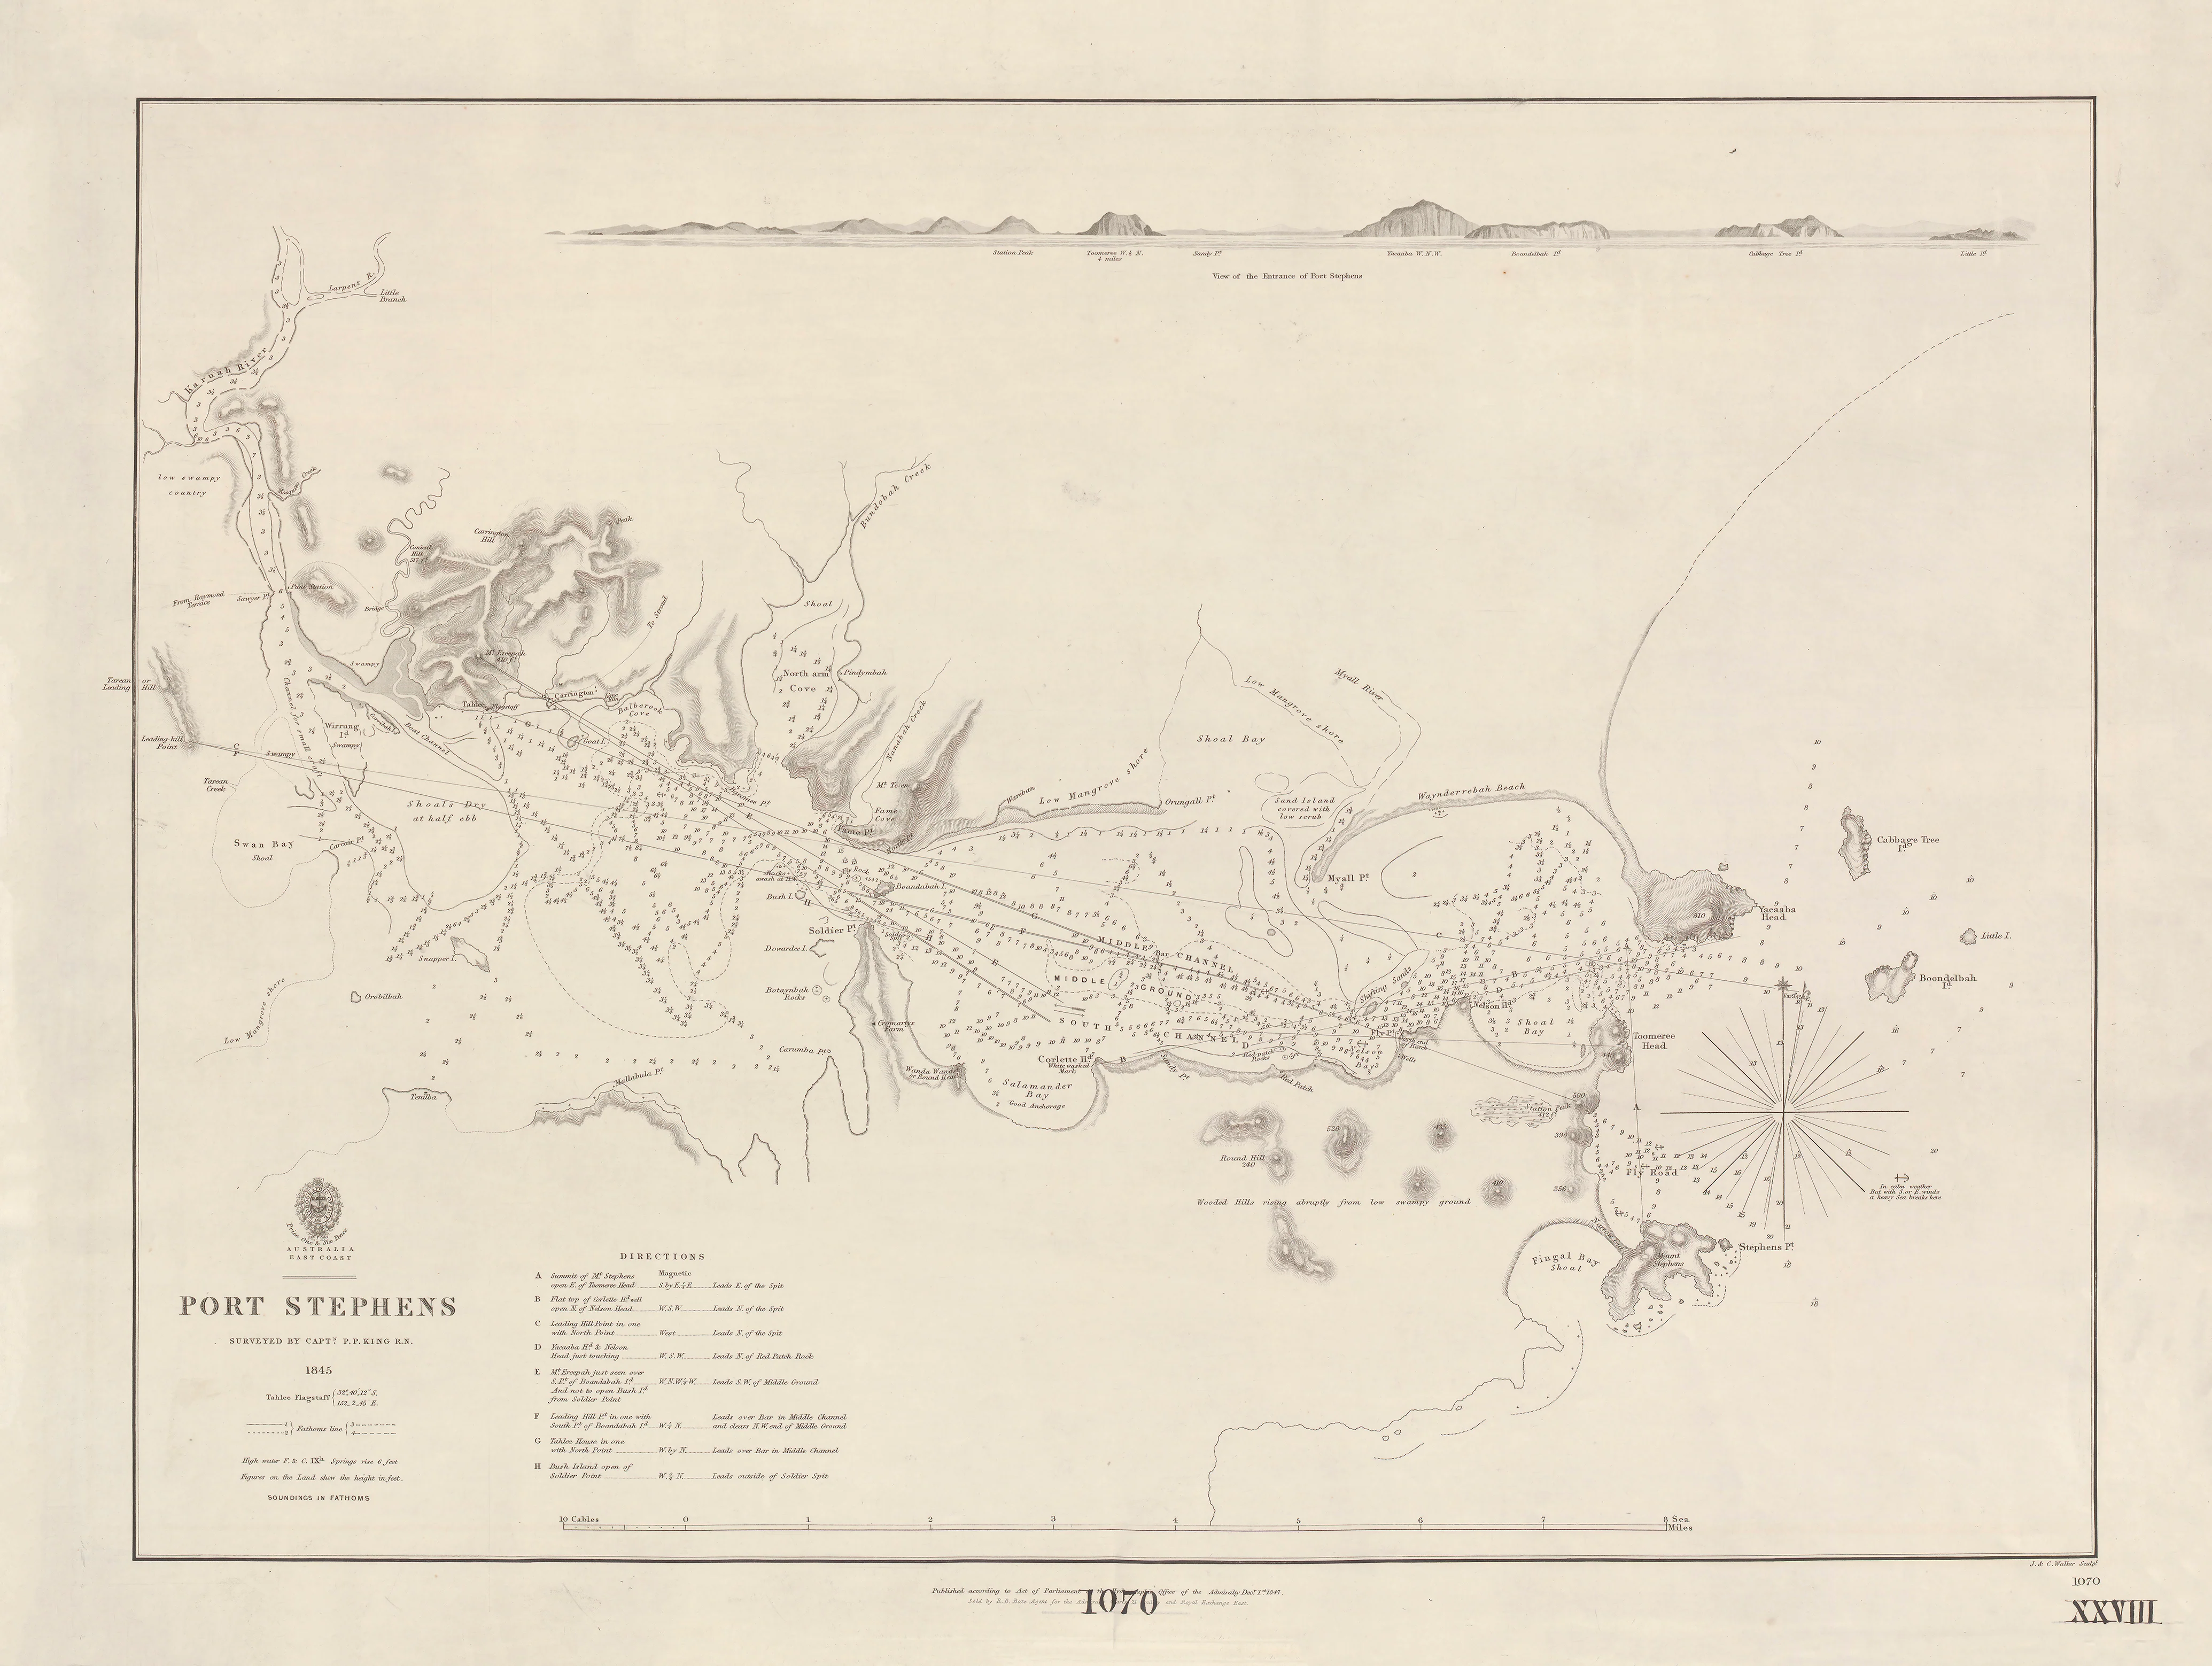
Chart of Part of the North-West & West Coasts of Australia — Sheet VII (1818–1839)
Phillip Parker King’s working map of Australia’s most remote shoreline
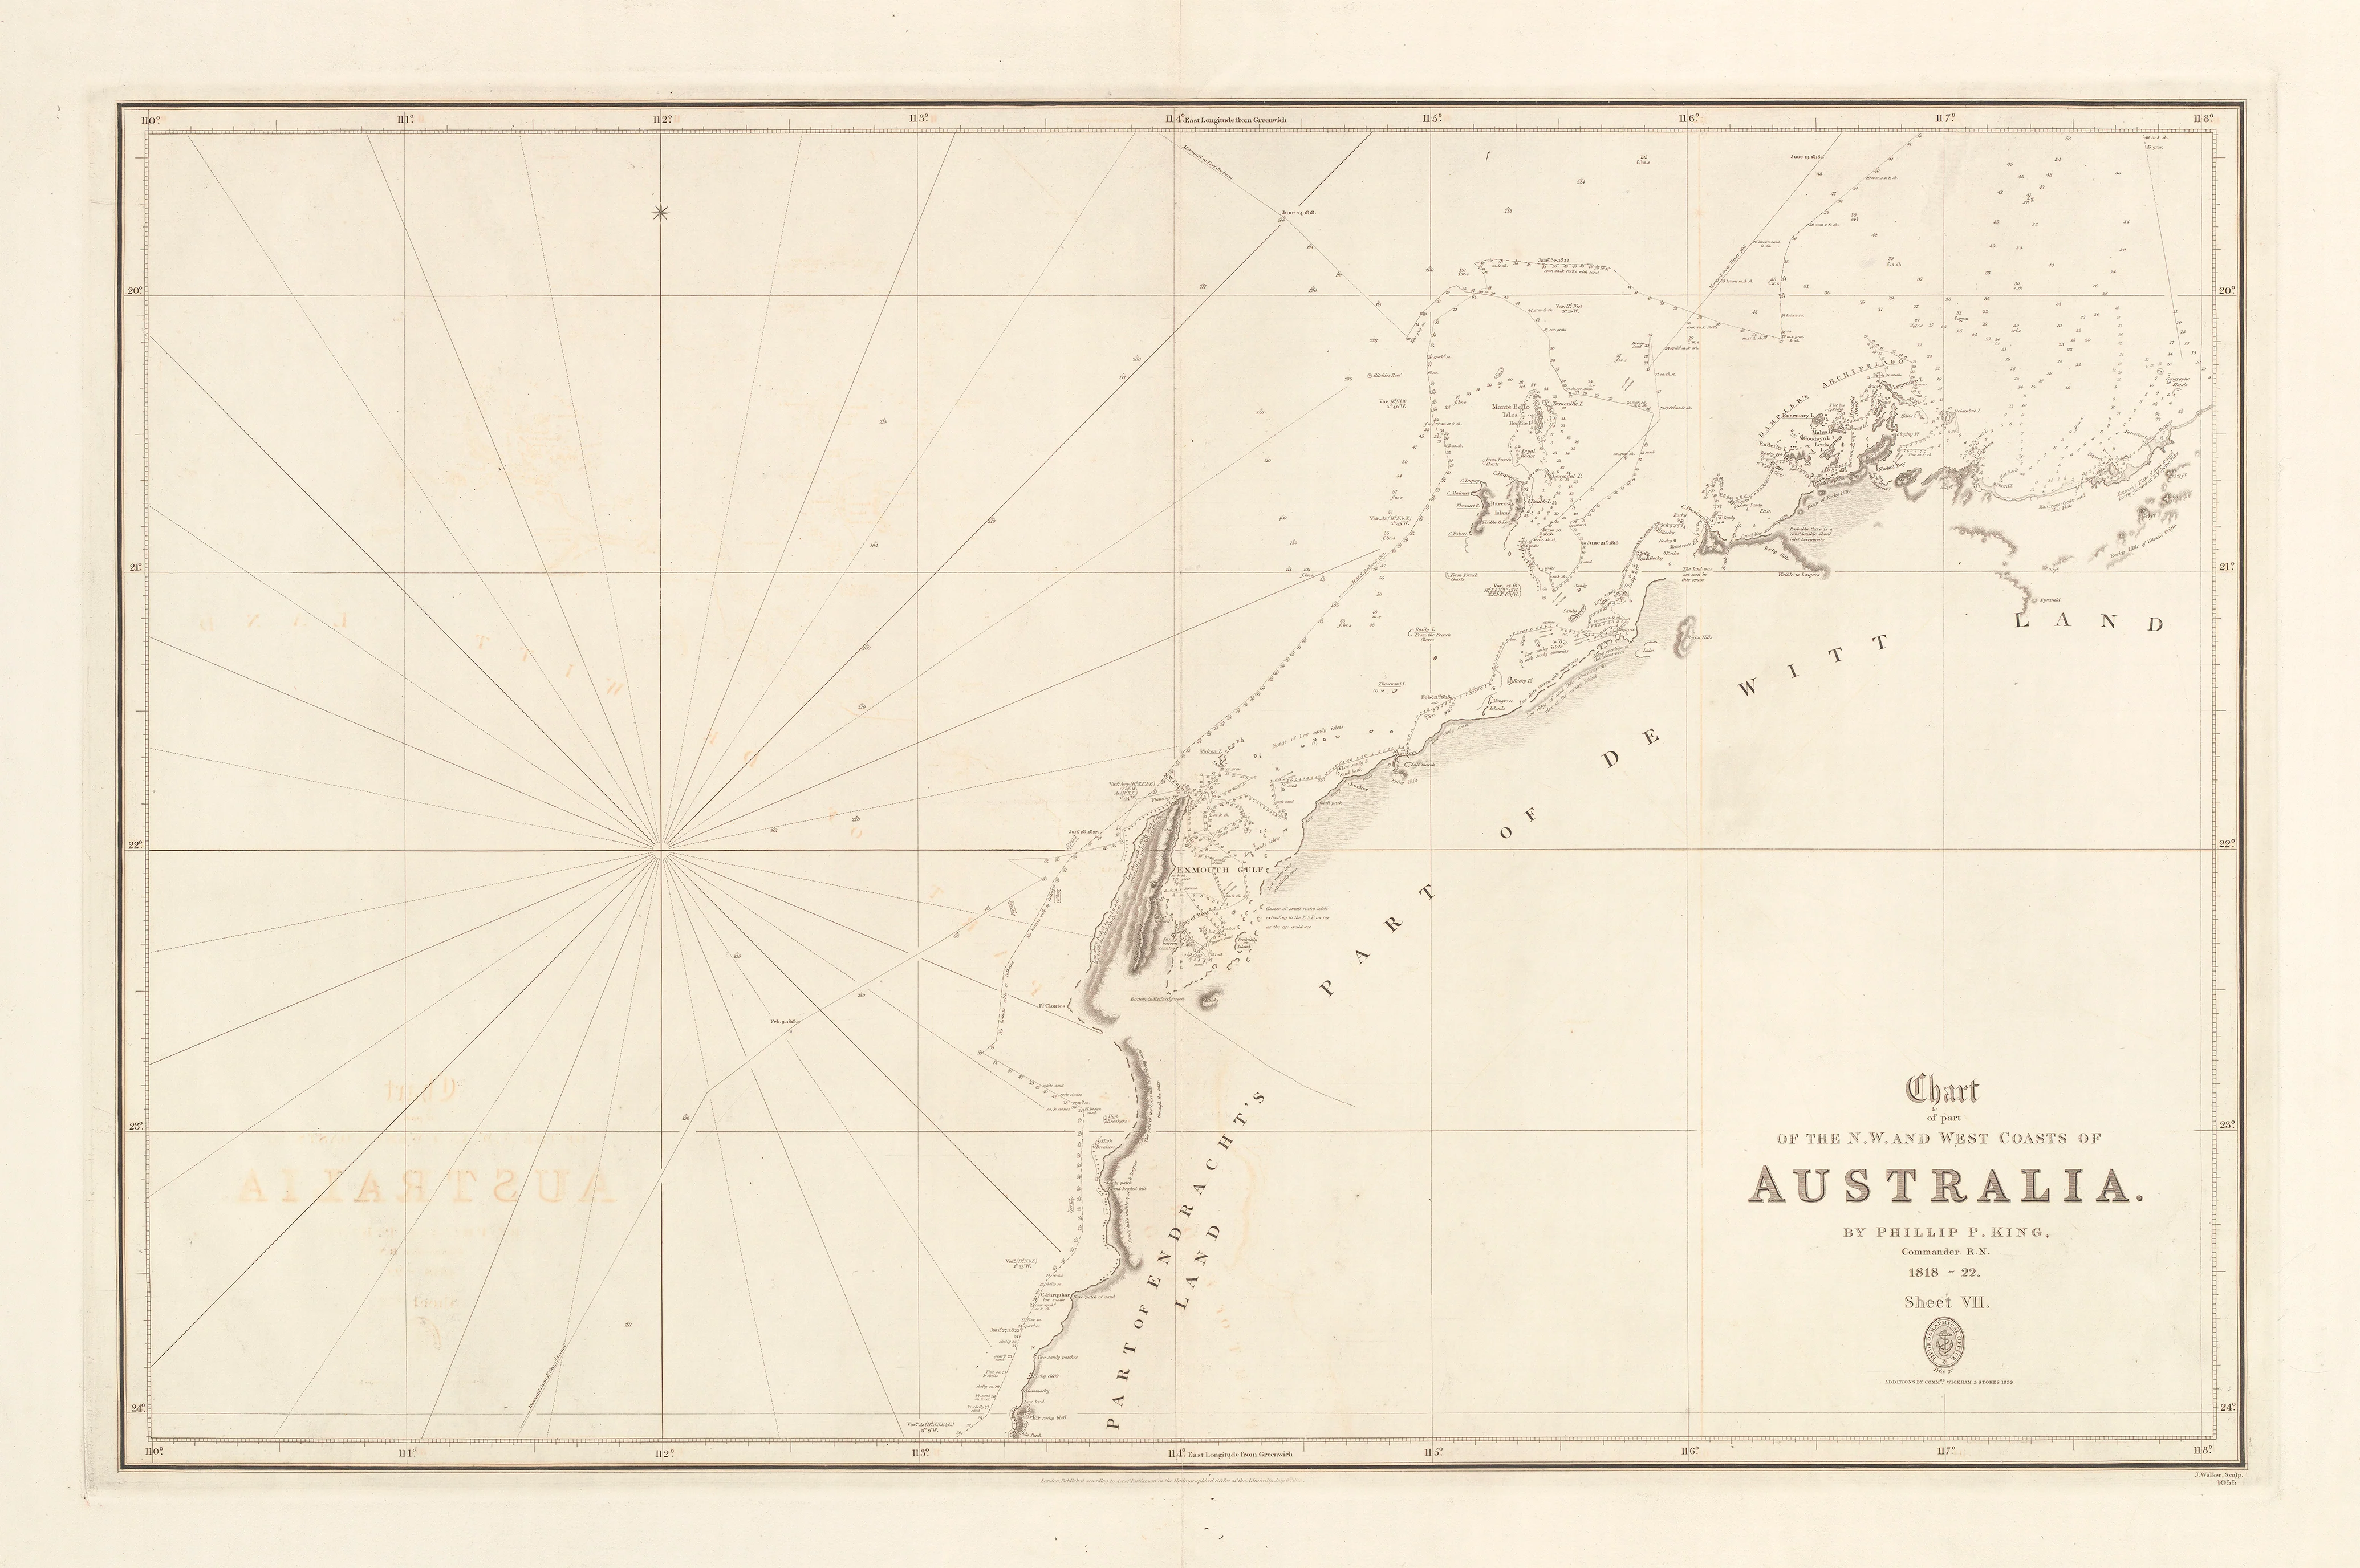
This powerful British Admiralty chart captures the long, little-known sweep of Australia’s north-west and west coasts at the moment they were first rendered coherent and navigable. Surveyed between 1818 and 1822 by Phillip Parker King, R.N., and later refined with additions by John Clements Wickham and John Lort Stokes in 1839, this sheet records the transformation of conjecture into charted reality.
Showing the tracks of H.M.S. Mermaid (1818) and H.M.S. Bathurst (1822), and engraved by J. Walker, it was issued by the Admiralty as an operational overview for navigation along one of the world’s most demanding coasts.
This is not a decorative map.
It is exploration made practical.
⚓ What This Chart Shows
This finely engraved Admiralty sheet presents a strategic overview with navigational depth:
-
The north-west and west coasts of Western Australia
-
Exploration tracks of Mermaid (1818) and Bathurst (1822)
-
Headlands, bays and offshore hazards
-
Bathymetric soundings indicating depths and dangers
-
Coastal relief shown by classic Admiralty hachures and spot heights
-
Greenwich prime meridian — true naval navigation standard
Every line reflects first-hand survey work gathered from open boats and lead lines along an unforgiving shore.
🧭 Why This Chart Works
Most maps show outcomes.
This shows the process of discovery.
-
Surveyed by Phillip Parker King, Australia’s foundational coastal surveyor
-
Updated by Wickham and Stokes, linking early exploration with later hydrography
-
True British Admiralty production — the global benchmark for accuracy
-
Clear synthesis of multiple voyages on a single operational sheet
-
Museum-grade engraving designed for use, not ornament
This chart is a cornerstone document in the making of Western Australia’s coastline.
✨ Premium Finishes
Every North-West & West Coasts of Australia — Sheet VII (1825/1839) chart is printed in Australia using archival methods to preserve the fine engraving and historic tone.
| Format | Description |
|---|---|
| 📜 Paper (160 gsm matte) | Smooth heavyweight archival paper with crisp line definition; ideal for framing under glass. |
| 🧼 Laminated (True Encapsulation) | 2 × 80-micron gloss laminate, edge-to-edge protection; tear-resistant and wipe-clean. |
| 🖼️ Canvas (395 gsm HP Professional Matte) | Pigment-based, fade-resistant inks for a warm, gallery-grade finish. |
| 🪵 Laminated + Timber Hang Rails | Natural timber rails with hanging cord; ready to hang. Allow up to 10 working days. |
| 🪵 Canvas + Timber Hang Rails | Elegant frameless presentation with lacquered natural timber rails. Allow up to 10 working days. |
📐 Size
1000 mm (W) × 664 mm (H)
A wide landscape format that emphasises the immense horizontal reach of Australia’s western seaboard.
🎯 Ideal For
-
Australian exploration and maritime history collectors
-
Western Australia and Kimberley heritage interiors
-
Museums, libraries and universities
-
Shipping, offshore and resources sector spaces
🤝 Our Commitment
-
Printed in Australia with professional colour management
-
Archival pigment inks for long-term colour stability
-
Premium laminates and canvas for durability
-
Natural timber hang rails for refined presentation
-
Hand-checked and carefully packed before dispatch
Before ports, pipelines and charts of convenience, there was this survey.
Choose your finish and bring Australia’s north-west frontier onto your wall.